Tag Archives: Chicken

Super Bowl Special: My Favorite Chicken Wings

Poster

Are you ready for some football? I’m excited about the post season and a little let down at the same time. Once again…the Dolphins made me cry! But, enough of the sniveling, how about some incredible chicken wings for your Super Bowl party?

I cannot make claim to this recipe as it is nearly word for word straight out of the Silver Palate Cookbook. Originally called Chicken Marbella, this wonderful recipe has been shared and talked about by many throughout the years. I however have made minimal changes to the recipe and cooking technique in order to make it “wing friendly”.

I made this batch after asking my daughter what she would like me to cook for her birthday to which she immediately answered “Oh my gosh how about those wings?” I knew exactly which recipe she was talking about! She likes them with a creamy Tzatziki sauce and celery sticks but I just gobble them down straight off the platter. Either way I can pretty much guarantee these wings will be the hit of the party and a new favorite in your recipe file!

Chicken Wings Marbella

10 Lbs – Chicken Wings, cut at the joints, tips removed
1 head of garlic, separated and peeled
1/4 cup dried Mexican oregano
1 Tsp Kosher salt
1/2 Tsp – freshly ground black pepper to taste
1/4 cup – red wine vinegar
1/4 cup – sherry vinegar
1/2 cup olive oil
1 cup pitted prunes
1/2 cup pitted Spanish green olives
1/2 cup capers with a bit of juice
6 bay leaves
1 cup light brown sugar
1 cup white wine
1/4 cup Italian parsley or fresh coriander (cilantro), finely chopped

Place cut wings in a large bowl. Place garlic, vinegar, olive oil, oregano, salt and pepper in a blender or small food processor. Pulse until garlic is “just” pureed. Pour the garlic mixture over the wings, add the prunes, olives, capers, and bay leaves then toss gently to coat. (I used my hands to gently fold the marinade into the wings.)

Cover the bowl and marinate the wings overnight.

Preheat the oven to 375. Spread wings evenly on one or two large sheet pans. Sprinkle the wine evenly over and around the wings then sprinkle evenly with the brown sugar. Bake 25 minutes.

If using two pans, switch the pan locations in the oven moving the pan on the bottom oven rack to the top rack and vice-versa. Then bake 25 minutes more.

Raise the oven temp to 500 and bake 10 more minutes monitoring very closely for burning. (If using two pans I recommend cooking each pan one at a time for this final browning step.)

With a slotted spoon transfer the wings, prunes, olives and capers to a serving platter or crock pot. Moisten with a few spoons full of pan juices and sprinkle generously with chopped parsley. Serve any extra pan juices in a sauce boat on the side.

Enjoy!

Velveting Chicken 101: Chicken Stir Fry with Chive Blossoms, White Birch and Enokitake Mushrooms

Photo by kathyhuntphoto.com

Have you ever wondered how Chinese restaurants get their chicken so moist and tender? I used to think they had added MSG or some secret tenderizer that made the chicken taste great but was probably horrible for you. I had all but given up on figuring it out, relegating myself to Chinese takeout when I craved that “velvety” goodness when I came across an article about a cooking process actually called velveting.

Used not only for chicken, but also for beef and even pork, velveting is the simple process of marinating the meat in a “batter” of egg whites and corn starch then frying or poaching to set the coating. In restaurants they usually fry the meat quickly in plenty of oil but having tried both I actually prefer poaching. I think the protein comes out more moist and tender when cooked in water and using a little less oil certainly never hurts.

Below is the recipe I prepared most recently but the beauty of a stir fry is the unlimited number of combinations of ingredients you can use. This one would be good with broccoli, snow peas, and maybe even a few cashews in place of the chive blossoms and mushrooms…use your imagination and see what new dish you can dream up. Just remember to cook your vegetables starting with the ones that take longest to cook and finishing with the most delicate.

Chicken Stir Fry with Chive Blossoms, White Birch and Enokitake Mushrooms

To velvet the chicken…

2 – Boneless skinless chicken breasts, about ¾ lbs
1 – Egg white
1 Tbsp. – Corn starch
1 Tbsp. – Shaoxing wine (or dry sherry)
1 Tbsp. – Sesame oil
1 sprinkle – Kosher salt

Slice the chicken breast into thin, even slices 1/8 to 1/4 inch thick. In a bowl large enough to hold all of the chicken, combine the 5 remaining ingredients and whisk to thoroughly blend. Stir in the chicken slices and toss to coat well. Cover and set in the refrigerator for at least 30 minutes.

In a wok over high heat bring 8 cups of water to a very light boil. Reduce the heat to medium and poach the chicken in two batches stirring gently to separate the pieces. Cook until the chicken turns mostly white (about two minutes) then remove to a strainer to drain.

Your chicken is now velveted and ready to use in your favorite stir fry!

For the stir fry…

2 cups – Velveted chicken breast
4 cups – Chive blossoms, sliced in two to three inch pieces, tough bottoms removed
2 cups – White birch mushrooms, trimmed, cleaned and separated
1 package – Enokitake mushrooms, trimmed, cleaned and separated (roughly 1 cups worth)
½ Cup – Chicken broth
2 Tbsp. – Shaoxing wine (or dry sherry)
2 Tbsp. – Tamari
1-1/2 Tbsp. – Hoisin sauce
1 Tbsp. – Garlic, finely minced or pureed
1 Tbsp. – Ginger, finely minced or pureed
1 Tbsp. – Corn starch
1 Tbsp. – Sesame oil
1 Tbsp. – Grape seed or peanut oil

In a small bowl mix the chicken broth, wine, tamari, hoisin, and corn starch until well blended. Set this aside for later.

Heat the wok over high heat and add the oils. Stirring rapidly, add the garlic and ginger and cook about 30 seconds continuing to stir. Stir in the white birch mushrooms and cook one minute before adding the chive blossoms, cook two minutes more while stirring…try to keep the ingredients spread out rather than all crowded in the middle of the wok.

Stir in the chicken then pour in the sauce mixture tossing all to combine. Continue cooking only until the sauce has come to a boil and has begun to thicken.

With the wok off of the heat gently stir in most of the enokitaki mushrooms reserving some for garnish.

Serve over cooked rice and enjoy!

Randy

Crusty Chicken with Mushroom & Leek Sauce

Photo by kathyhuntphoto.com

Photo by kathyhuntphoto.com

I just have to say Jacques Pepin is one of my favorite “celebrity” chefs! Between the wonderful shows with he and Julia Child and the “you can do this at home” approach to so many of his recipes, I really have grown to appreciate his work. Tonight was no exception as I was looking to use a giant chicken that my wife brought home but wanted something fast, something other than the same old tired recipes.

Jacques calls for chicken thighs but I split that giant chicken in half saving half (still over 3 lbs of chicken!) for later. Leaving the chicken intact, I removed all but the largest bones from the half that I did cook making it lay nice and flat in the pan…it cooked up perfectly! I took a few other small liberties with the recipe but the credit for this one absolutely goes to Jacques. Thank you Chef Pepin for all that you do!

For your cooking pleasure you can find the original recipe here: http://www.kqed.org/w/morefastfoodmyway/recipes.html#210

Crusty Chicken with Mushroom & Leek Sauce

One half chicken, intact with all but the largest bones removed, skin on
1 teaspoon salt
1 teaspoon freshly ground black pepper
1 cup leeks, rinsed and halves lengthwise, then sliced in ¼ inch slices
1 1/2 tablespoons coarsely chopped garlic
3 cups washed and sliced (1/4 inch) baby bella or white mushrooms
Roughly 1/3 cup dry white wine
2 Tbsp parsley chopped fresh, plus one Tbsp for garnish

Arrange the chicken skin side down on a cutting board. Using a sharp paring knife, trim off any excess skin at the edges, remove wing tips, and cut about 1/2 inch deep into the flesh on either side of the thigh bone. (This will help the meat cook more quickly.) Sprinkle each side evenly with ½ of the salt and pepper and arrange the chicken skin side down in a nonstick skillet with a tight-fitting lid.

Place the skillet over high heat and when the chicken starts sizzling reduce the heat to medium low, cover tightly, and cook for 18 to 20 minutes, checking occasionally to make sure the chicken is browning properly. Meanwhile, preheat the oven to 150 degrees. If the chicken seems to be cooking too fast after 10 minutes or so, reduce the heat to low. The skin of the chicken should be very crisp and brown. Transfer the chicken skin side up to an ovenproof platter and place it in the oven.

Discard all but 2 tablespoons fat from the skillet in which you cooked the chicken. Add the leeks, garlic, and mushrooms and sauté them over high heat for about 3 minutes. Test for seasonings and add salt and pepper to taste then add the wine and any liquid that has accumulated around the thighs on the platter. Cook the sauce over high heat for about 1 minute to reduce the liquid.

Note: If a richer sauce is desired stir 1 Tbsp of butter into the mushrooms just before serving.

To serve, divide the sauce among serving plates. Carve the chicken into serving portions and place in the middle of the mushroom sauce on each plate, spoon some sauce over, sprinkle with additional fresh parsley, and serve.

Enjoy!

Randy

Oyako Donburi – A Little Warmth On A Rainy Night

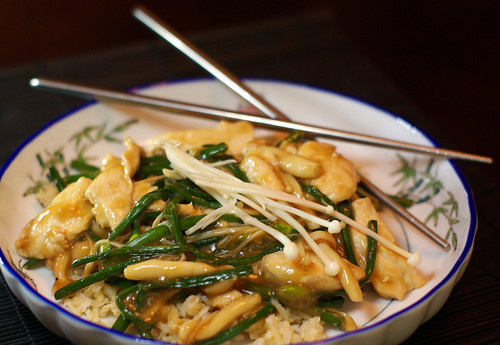
Photo by kathyhuntphoto,com

Wikipedia defines Comfort Food as “food prepared traditionally, that may have a nostalgic or sentimental appeal, or simply provide an easy-to-eat, easy-to-digest meal rich in calories, nutrients or both”.

While I wouldn’t argue with any of the above I might add that, Comfort Food for me is often a dish that will comfort my soul following a rough time, can be a dish that reminds me of someone I care deeply about and most certainly, comfort food will warm the body on a cold day or the heart on a rainy one.

Getting back to the definition, Wikepedia goes on to say comfort foods can be “foods that have a nostalgic element either to an individual or specific culture” and this is where I get to my point. Oyako Donburi is a very well known comfort food in Japan and especially popular in Hawaii. It is a dish of chicken and eggs simmered in a warm broth and served in a bowl over rice.

In Japanese “Oyako” loosely translates to “parent and child” and “Donburi” is usually “bowl” or “rice bowl”. You may also see this dish called “Oyakodon” which is simply an abbreviation of the same. Vaguely similar in ingredients to the Vietnamese soup, Pho Ga, which has definitely become a comfort food for my wife and I, Oyako Donburi may well become our next new favorite.

Which brings me to today…it’s been raining steady here for two days straight and yesterday was a lazy, rainy Sunday.  It was the perfect day for making a big batch of homemade chicken stock and when the rain continued all day today, a comfort food meal seemed to be just what the doctor ordered. After a little research and some stovetop experimentation, Oyako Donburi was just the right prescription for a cozy night at home!

Notes: This recipe is not entirely authentic and is something of a fusion recipe as I use a Chinese method of “velveting” the chicken in step 1. Although you can skip this step and simply simmer the chicken pieces in the broth with the onions, I highly recommend taking the extra few minutes. The difference in flavor and texture is well worth the added effort.

Once the chicken is “velveted”, I prepare Step 3 one portion at a time for continuity…this step comes together fairly quickly. Feel free to experiment with ingredients; a Google search of Oyako Donburi recipes will give you many ideas from adding miso or cilantro to using bonito flakes (dried fish) for a variety of flavors.

Oyako Donburi

Begin by preparing enough brown rice for two 1 to 1-1/2 cup portions, then go to step 1 while the rice is cooking. The rice should be steaming hot when added to the bowls as it serves to finish cooking the eggs.

Step 1 – “Velvet” the chicken:

2 Tbsp – Dry sake
2 Tbsp – Warm water
2 Tbsp – Corn starch
1 – White of 1 large egg
1 – Good pinch of kosher salt
1 Large or 2 small – Chicken breast halves, split lengthwise then sliced crosswise into thin slices
1 Tsp – Sesame oil

Combine the first 5 ingredients and whisk only until well combined. Stir in the chicken pieces and marinate this mixture for at least ½ hour, refrigerated.

Fill a small wok (or a med sauce pan) at least half full with water and bring to a gentle boil. Add 1 tablespoon of sesame oil then carefully add ½ of the chicken, strained of excess marinade, and cook gently separating the chicken slices to prevent clumping.

When the chicken is solid white and cooked through (about 1-1/2 to two minutes) the chicken will begin to float. At that point, remove the chicken to a strainer to drain. Repeat until all of the chicken is cooked setting the strainer over a bowl to drain. Discard the water and if making ahead, refrigerate the chicken until ready to use. Note: I used a Chinese Spider Strainer for this cooking process and a traditional 8″ mesh strainer to drain the chicken.

Step 2 – Simmer and “bowl” the following 1 portion at a time

1/2 Cup – Fresh chicken broth
1 Portion – Chicken, prepared in step one
1 quarter – Large yellow onion, sliced in ¼” slices, divided
3 Med – Shitake mushroom caps, sliced in ¼” slices, divided
2 – Green Onions, sliced thin on a sharp angle (bias)
1/4 Cup – Fresh arugula (or spinach)
2 Tbsp – Dry sake
2 Tbsp – Tamari sauce
2 Tsp – Agave nectar
½ Tsp – Sesame Oil
2 eggs
Nori (Dried seaweed) for garnish

In a small wok or pan (I used a non-stick egg skillet) bring the broth to a gentle boil over medium high heat. Stir in the sake, tamari, agave nectar and sesame oil, then add the onion and mushroom slices. Simmer until the onions are just becoming translucent (about 5 minutes) then add the chicken from step 1 along with the arugula.

Simmer one minute more stirring to ensure even heating. (Note: If you are skipping step one, add the chicken one minute after the onions and mushrooms and simmer until cooked through, then add the arugula for one minute more.)

Crack the eggs into a bowl and beat just enough to break the yolks and slightly mix the eggs. Stir in half the sliced green onions then gently pour the eggs evenly over the top of the simmering broth. Cook 30 seconds, then using chop sticks, stir once just enough to distribute the eggs evenly, cover and cook 30 seconds more while you spoon the rice into a bowl for serving.

(If necessary microwave the rice for 30 seconds to make sure it’s hot then) Gently slide the cooked mixture out of the pan and into the bowl over 1 to ½ cups steaming hot rice.  Cover the bowl with a saucer and serve as the eggs finish cooking in the hot bowl. Garnish with the remainder of the sliced green onions and crumbled or sliced dried nori.

Enjoy!

Randy

Menu for Two – Seared Boneless Skinless Chicken Breast w/ Rosemary Shallot Pan Sauce and Braised Kale

Photo by KathyHuntPhoto.com

As a home cook, one of the ways I work on improving my “chops” is by challenging myself. Sometimes I’ll pick a “secret” ingredient, a la Iron Chef, and other times I’ll prepare what I call a Pantry Dinner. For these, I simply scan the fridge and the pantry for ingredients, check out what produce we have on hand and try come up with something tasty for dinner. (If anyone remembers Gordon Elliot’s Doorknock Dinners show…that’s where I got the idea.) This recipe was the result of one of those “Pantry Dinner” nights.

On this particular evening I had to come up with something quick because I was a little late getting home…so late in fact, that I had actually thought of just making omelets and toast. But upon scanning the refrigerator I discovered half a bottle of wine, a package of chicken breast, and ½ a bunch of fresh kale left unused from a previous night. With a stash of whole shallots (Albertson’s has had good ones for 2.99 a pound lately) and a fresh head of garlic I was off to the races.

This cooking method is a fairly foolproof way to cook boneless skinless chicken breasts; they always come out nice and moist. Just be very careful pulling that pan out of the oven! I have a potholder glove that I keep on the handle of the pan while making the sauce. The pan sauce is very quick, it should take no longer than two minutes or so to reduce the wine. Remember to remove the pan from the heat before you stir in the butter. For this tiny amount of butter there should be no need to return the pan to heat. (Doing so could cause the sauce to separate causing it to be unpleasantly greasy.)

Start to finish this “Pantry Dinner” was on the table in about half an hour. With a piece of crusty whole grain bread, a salad and the rest of the wine this ended up being a rather nice dinner for two…I hope you’ll try it!

Seared Boneless Skinless Chicken Breast with Rosemary Shallot Pan Sauce and Braised Kale

For the chicken:
Two – Boneless, skinless chicken breast halves
¼ Cup – Dry white wine (I used Pinot Grigio)
1 – Med Shallot, chopped
1 Branch – Fresh rosemary (leaves only) chopped finely
Approx. 1 Tablespoon – Fresh lemon juice
1 Tablespoon – Unsalted butter, cut in 4 to 6 pieces and kept very cold
1 Tablespoon – Olive oil
Season with an Italian Herb Seasoning Grinder

For the braised kale:
4 cups – Fresh kale, stems removed, leaves torn or cut into bite-sized pieces
1 – Med Shallot, chopped
1 Clove – Garlic, minced
¼ Cup – Dry white wine
Approx. 1 Tablespoon – Fresh lemon juice
1 Tablespoon – Olive oil
Season with an Italian Herb Seasoning Grinder

Pre-heat the oven to 350 degrees. Heat a 10” oven-proof pan over medium-high heat and using the Italian Herb Seasoning Grinder, season the chicken fairly liberally on both sides while the pan is getting hot. When the pan is hot, add roughly 1 tablespoon of oil and swirl or shake the pan to cover evenly. (There should be “just” enough oil to coat the pan.)

Carefully place the chicken in the pan, skinned side down and sear until some browning appears around the edges, about 4-5 minutes. Turn the chicken over and cook 1 minute more, cover and place in the oven for 20 minutes.

Meanwhile, warm a large sauté pan over medium heat, when the pan is hot add 1 tablespoon of olive and swirl or shake the pan to cover evenly. Season the oil with a few good grinds from the Italian Herb Seasoning Grinder then sauté the shallot and garlic just until the aroma of the garlic begins to fill the kitchen, about 1 minute. Add the kale and toss to coat with some of the oil.

Add the wine and a squeeze of lemon juice and cover. Cook covered, 15 minutes or until the kale is tender, stirring every few minutes. Toss again and check for seasoning just before serving. If necessary, add a little salt & pepper to taste.

After 20 minutes, very carefully remove the chicken from the oven holding the handle of the pan with a pot holder or “dry” dish towel. Remove the chicken to a plate (or cutting board) to rest. Place the pan with any remaining juices over medium-high heat. As the pan juices begin to boil, stir in the shallots. Cook about one minute then add the white wine and a squeeze of fresh lemon juice. Return to the boil and allow this to cook until about three quarters of the liquid has evaporated.

When the liquid in the pan has reached nearly the consistency of syrup, turn off the heat and remove the pan from the burner, stir in the rosemary and half of the butter. Continue stirring and when that butter has melted, stir in the remaining butter. Stir until all of the butter has melted into the sauce and set the pan aside while you prepare your plates.

To serve, spoon a healthy serving of the kale onto each plate. Carefully slice the chicken in diagonal slices, fan the slices out and serve next to, or right on top of the kale with the sauce spooned evenly over the chicken.

Enjoy!

Randy

Speaking of Comfort Food – Pho Ga

Photo by KathyHuntPhoto.com

Even in the warmest months of the year I am still quite fond of soup. Because this is historically the season of lighter meals I will usually choose a broth based soup as opposed to the heavier chowders or other cream soups. Just lately too I have been feeling a little under the weather so I figured it was a perfect time for a pot of soup.

It was once chicken noodle soup that cured my blues, until I discovered miso soup, that is. With its salty essence of the sea combined with the health benefits of tofu and seaweed…miso soup just seemed so, well…healthy! Ah, but then I found Pho; a Vietnamese soup steeped with perfumey flavors of the orient in a warm and comforting bowl of goodness!

Pho is a light, broth based soup most commonly made with beef, featuring tender rice noodles, vegetables, and aromatic herbs and spices. Also very popular is Pho Ga, which is essentially the same soup, made with chicken. Upon reading Jaden’s Pho Ga post over at Steamy Kitchen this is the Pho I set out to make this past Sunday morning.

I decided I could come up with a reasonable facsimile of the broth using my good old standby chicken stock recipe along with a few additions I already happened to have in the pantry. I was very pleased with the results! Don’t let the length of the recipe scare you…it really comes together quite easily with the hardest part being the long slow simmering of the stock.

Starting right after my morning coffee I spent only 15 minutes getting the ingredients prepped and inside of 30 the stock was well under way. The garnishes on the other hand would require a trip to the market while the stock was simmering gently on the stove. As a bonus…the house smelled delicious by the time I got back from the store!

The garnishes by the way are the fun part of Pho! Usually served alongside so that you may add as much (or as little) as you like, the most common garnishes are: Hoisin sauce, Sriracha or other pepper sauces, sliced chili peppers, Thai basil, culantro, fresh lime, and bean sprouts. With so many to choose from, each bowl of Pho tastes just a little different depending on the individual diner.

Of special note: In this recipe I am using a technique for “Velveting” the chicken. I searched for what seemed like forever trying to find out just how Chinese and other Asian cuisines get their chicken so wonderfully tender and I have finally found it. Look for more about this technique in future posts!

Pho Ga

Notes: For the most authentic Pho flavor use a grill to brown the chicken parts instead of the oven. The spice quantities are approximate based on how strong you would like these flavorings to be.

Step 1 – Prepare a chicken stock as written in Singing the praises of Chicken Stock, omitting the Thyme and adding the following ingredients at the same time that you add the chicken pieces to the pot:

2 to 3 ounces – Fresh ginger root, about 2 inches, roughly chopped
2 to 3 pods – Star anise
3 to 4 – Whole cloves
1 Tbsp – Ground coriander
1 Tbsp – Whole celery seed
1 Tbsp – Dark agave nectar, or molasses

Step 2 – While the stock is cooking, “Velvet” the chicken…

Whisk together…

2 Tablespoons – Shaoxing wine
2 Tablespoons – Warm water
2 Tablespoons – Corn starch
1 – White of 1 large egg
1 – Pinch kosher salt

Then marinate 1 large chicken breast half, split lengthwise then sliced very thin, in this mixture for at least ½ hour, refrigerated.

Fill a wok (or a large wide frying pan) at least half full with water and bring to a boil. Add 1 tablespoon of sesame oil and reduce the heat to a steady simmer. Carefully add ½ of the chicken, drained of excess marinade, and cook for one minute gently separating the chicken slices to prevent clumping.

When the chicken is solid white and cooked through (about 1 to 1-1/2 minutes) remove to a strainer to drain. Repeat until all of the chicken is cooked setting the strainer over a bowl to drain. Refrigerate the chicken until ready to use. Note: I used a Chinese Spider Strainer for this cooking process and a traditional 8″ mesh strainer to drain the chicken.

Step 3 – Slice a large white onion first in half, then in paper thin slices. Soak the onion slices in cold water for at least 30 minutes.

Step 4 – Cook the noodles and serve…

Prepare one package of Bahn Pho (or Rice Noodles) per the directions on the package. Add a serving each of the noodles, the onion slices, and the prepared chicken to each serving bowl, then ladle over the broth to cover. Serve with your choice of bean sprouts, Hoisin sauce, Sriracha or other pepper sauces, sliced chili peppers, Thai basil, culantro, and fresh lime slices on the side.

Enjoy,

Randy

Mother’s Day Brunch – Tzatziki Chicken Mousse

This is the second in my Mother’s Day brunch series. Although it is not truly a mousse; the term does describe the airy and light consistency. Basically a whipped chicken salad, served with celery sticks or crackers, this is a nice savory “munchie” for in between courses. If you prefer, it would also make a nice tea sandwich or canapé garnished with capers or gherkins. Because of the whipped consistency this dish is best served right away, fresh out of the processor. (Note: This recipe came out quite good using the meat from a rotisserie chicken.)

Tzatziki Chicken Mousse

1 Cup – Cooked chicken meat, white & dark, cubed
1 – Small Shallot, chopped
1 – Celery stick, chopped
¼ Cup – Tzatziki Sauce
1 Tablespoon – Mayo
1/2 tsp – Dried Tarragon
1/2 tsp – fresh lemon juice
Kosher salt & fresh ground black pepper

Pulse the chicken in a food processor until crumbly and continue pulsing while adding the shallot and celery. Add the Tzatziki, mayo, tarragon, and lemon juice and process until quite smooth and fluffy. Check for seasoning and add salt & pepper to taste. Serve immediately with celery sticks and crackers.

Enjoy,

Randy

Chicken Penne Mediterranean

Boneless skinless chicken breast can be so boring sometimes! Yesterday morning I had taken two frozen breast halves out to thaw and thought all day about how I was going to prepare them; I ran the gamut from simple and uncomplicated to full blown kitchen chemistry lab. By the time I left work I had in my mind visited Italy, Spain, and the South of France, stopped off in Ireland for a while and even hung out in Mexico and the Deep South!

When I finally got to the grocery store I was feeling totally uninspired so I picked up salad ingredients and a bottle of Pinot Grigio and headed home. I figured I would cook the chicken simply, using whatever I could dig up in the pantry. Then as I dug around I began to form an idea; I had zucchini that needed to be used, pasta, a giant jar of capers, Spanish olives, a can tomatoes and bingo that was it…We were going to the Mediterranean!

Drawing on fond memories of Snapper Veracruz and Pasta Puttanesca recipes I had prepared in the past I landed somewhere between simple and a science experiment. I cooked the chicken separately from the sauce because oftentimes when chicken is cooked in a liquid, it produces an unappealing protein scum (for lack of a better description). This also allowed for a good browning of the meat, assisted by a little tomato paste, that really added a richness to the final product. The anchovy paste and the final tablespoon of capers also boosted the flavor of the sauce.

Note: If it seems your sauté pan is not large enough to hold everything use a large bowl to fold together, the sauce and the pasta.

Chicken Penne Mediterranean

1 – 28 Oz Can, Peeled Whole Tomatoes
2 – Lg. Boneless, Skinless Chicken Breast Halves, trimmed and cut in ¾ to 1 inch chunks
8 Oz – Whole Wheat Penne
2 – Med. Zucchini, halved lengthwise then sliced
1 – Med Onion, Quartered then sliced
1 – Small Carrot, finely grated
¼ Cup – Capers, 1 Tbsp reserved
¼ Cup – Green Spanish Olives, pitted
¼ Cup – Dry White Wine
¼ Cup – Balsamic Vinegar
¼ Cup – Chicken Stock
1 Tbps – Tomato Paste
1 Branch – Celery, sliced
3 Cloves – Garlic, minced (divided)
1 Lg. Sprig – Fresh Rosemary
1 tsp. – Dried Oregano
¼ tsp – Anchovy Paste (Optional)
Fresh Ground Pepper
Fresh Ground – McCormick’s Italian Seasoning Grinder
Olive Oil
Fresh Parmigiano-Reggiano, shaved

In a large sauté pan over med heat warm 4 Tbsp. of olive oil until shimmering. Add 2 cloves minced garlic, anchovy paste and about ¼ Tbsp. of ground Italian seasonings to the pan and sauté 1 minute, stirring. Stir in onions and celery and cook stirring occasionally until the onions begin to turn translucent. Stir in the carrots, rosemary, and oregano, and cook 5 minutes more, stirring occasionally.

Add the wine and allow it to come to a boil, scraping up any browned bits that have stuck to the pan. Add the tomatoes, carefully crushing them as you add them to the pan. Add the capers and olives and allow the sauce to come to a boil once again. Reduce the heat to a steady simmer and cook 30 minutes. Stir in balsamic vinegar and continue simmering.

Meanwhile warm 1 Tbsp of olive oil in a large non-stick pan over high heat. When oil is shimmering, add 1 clove of garlic and stir briskly, 30 seconds. Stir in chicken and cook stirring for 1 minute then add the tomato paste. Continue cooking, stirring often until the chicken has browned and just cooked through. Add the cooked chicken, zucchini, and chicken stock to the sauce and continue simmering until the zucchini is just cooked through. Season to taste with fresh ground black pepper and remove and discard the rosemary sprig.

While sauce is simmering, bring a large pot of salted water to a boil, add pasta and cook per package instructions. When the pasta is cooked to your liking, drain (do not rinse!) in a colander and fold the pasta, along with the reserved tablespoon of capers, into the sauce. Serve garnished with shaved parmesan.

Enjoy,

Randy

Mmm…Turkey Stroganoff

(or What to do with all that Chicken Stock – Part 3)

We’ve been eating a lot of plain non-fat yogurt lately and I have been using it more and more in my cooking. I started out utilizing it in place of sour cream on baked or twice baked potatoes, then we started mixing it with a little sugar-free fruit preserves and a touch of agave nectar for a guilt-free dessert. Nowadays I use non-fat yogurt in everything from cornbread and pancakes to French onion dip.

To boost the acidity to more closely resemble sour cream, I nearly always add a little lemon juice to the recipe. When using plain non-fat yogurt in a sauce remember to remove the sauce from the heat before incorporating the yogurt. The reason for this is because with no fat to assist in thickening or emulsifying, plain non-fat yogurt will separate or curdle if you boil it.

You can lessen the chances of your sauce separating by using Greek yogurt which is thicker by nature or by straining your plain non-fat yogurt to thicken it. This is done by draining the yogurt through a fine sieve, cheesecloth, or coffee filter to remove the whey (the watery stuff) and thicken it. This results in a thicker more flavorful “yogurt cheese” that is delicious in dips and cold sauces like Tzatziki. There is a great article here that explains better how to do this.

This Turkey Stroganoff is a “lower” fat recipe that is a good example of using plain non-fat yogurt in a savory recipe. It is also another way to use that good homemade chicken stock I’m always preaching about. Reducing the stock with the turkey, mushrooms, and onions creates a rich sauce with a depth of flavor that would fool even the pickiest of eaters in your house.

Turkey Stroganoff

1 Lb – Ground Turkey
1 Lb – White Mushrooms, sliced in 1/4 inch slices
1 – Med Onion, chopped
3 Cups – Homemade (or low sodium) Chicken Stock
1 Cups – Plain non-fat yogurt
Juice of ½ Fresh Lemon
1 Tbsp – Dry Rubbed Sage
1 Sprig – Fresh Rosemary
1 – 16 oz Package Whole Wheat Extra Wide Egg Noodles
Kosher Salt & Freshly Ground Black Pepper
Olive Oil
Fresh Parsley, chopped

Add 2 Tbsp of olive oil to a very large (12” or more) sauté pan over medium high heat. When the oil just begins to smoke, carefully add the mushrooms and cook them stirring constantly much as you would a stir fry. When the mushrooms begin to release their liquid slow down a little on the stirring but keep them spread out so the liquid will evaporate quickly.

As the liquid evaporates and the mushrooms begin to brown, stir in the onions, sage, rosemary, and a few good grinds of black pepper. Continue cooking and stirring one more minute, then lower the heat to medium high. If the pan seems dry add one more Tbsp of olive oil then add the ground turkey and continue to cook stirring often and gently breaking up the turkey until the meat is mostly cooked through.

Meanwhile, fill a large pot with 2 quarts of water and 2 Tbsp of kosher salt. Place the pot over high heat to come to a boil.

Stir in two cups of chicken stock into the turkey mixture, scraping up any browned bits that may have stuck to the pan, continue to cook stirring only occasionally. Allow the stock to come to a boil and cook stirring from time to time, until most of the stock has evaporated, about 10 minutes. Add one more cup of stock and return to a boil cooking about 5 minutes more. Turn off the heat and stir in the lemon juice.

When the pot of water has come to a full boil, stir in the noodles, reduce the heat to medium high, and cook according to the package directions.

When the noodles are done drain them in a colander and while the noodles are draining remove the turkey mixture from the heat. Gently (so as not to break up the mushrooms) stir the yogurt into the mixture to form a sauce. Now gently add the noodles to the same pan, folding the noodles and sauce until well mixed. Garnish with the fresh parsley and serve hot.

Enjoy,

Randy

Menu – Pan Seared Pork Chops with a Dijon “Cream” Sauce, Roasted Sweet Potatoes, and Sautéed Kale with Caramelized Onions and Garlic

Oh, but I do love pork! Granted, as we have grown both in age and in wisdom my wife and I eat much less pork than we used to. The old “everything in moderation” certainly holds true here and while I do eat more pork than beef, I also believe it’s all about balance and I try not to overdo it. No really…I do!

Ok, I admit it; I did pick up this lovely package of chops just last week and last night was the second Tuesday in a row that we enjoyed them. It will however be quite some time before we have them again as they are a fattier cut of pork. Even though there is still some debate regarding the health benefits of pork I do try to pick the leaner cuts if I am going to cook it.

So while you will see it here once in a blue moon I hope you can appreciate that we consider pork an exception to our otherwise healthy diet, a special treat if you will. The same holds true for beef. Some may call it rationalization but I firmly believe that eating whole grains, lower fat foods, and fresh vegetables as the major part of my diet gives me a little leeway. It allows me to enjoy myself from time to time and cook something a little less good for me without feeling guilty. And it tastes oh so good!

As a nod to that healthier diet this sauce is my lower fat answer to a Dijon cream sauce. There is no butter and there is no cream. I think the non-fat yogurt adds a nice creaminess to this sauce and in such a small amount that it doesn’t overwhelm the other flavors. Adding the yogurt at the last minute, off the heat, keeps it from separating or curdling in the sauce. You can use plain non-fat yogurt in many dishes in place of sour cream, milk, or cream just be sure not to let it boil.

This recipe is written as a menu for 4 and it comes together in 1 to 1-1/2 hours depending on the size of the potatoes. Although I did not do it this night, I often sprinkle Italian Seasoned Bread Crumbs over the kale as a garnish. Try it, you’ll like it!

Menu – Pan Seared Pork Chops with a Dijon “Cream” Sauce, Roasted Sweet Potatoes, and Sautéed Kale with Caramelized Onions and Garlic

For the Sweet Potatoes…

Preheat the oven to 350 degrees. Rinse and dry 1 Sweet Potato per person. Using a paring knife carefully pierce each potato once, at least halfway through (from the side). Rub potatoes thoroughly with olive oil and bake 1 to 1-1/2 hours until cooked through.

For the Kale…

4 Cups – Fresh Kale, trimmed and chopped into bite sized pieces
1 – Medium Onion, quartered then sliced thick
2 – Cloves Garlic, minced
1/2 Cup – Homemade or low sodium Chicken Stock
McCormick Italian Herb Seasoning Grinder
2 Tbsp. – Olive Oil
Malt Vinegar (Optional)

Heat the olive oil in a large sauté pan over medium heat. Add the onions and lower the heat to low. Add 4 good grinds from the Herb Grinder (about ¼ Tbsp) and cook slowly, stirring occasionally until the onions begin to turn golden. Stir in the garlic and continue cooking and stirring occasionally until onions begin to brown (about 30 minutes over all).

Add the kale and toss to coat well with the olive oil, raise the heat and sauté for 1 minute. Add the chicken stock and cover. As soon as the stock comes to a boil lower the heat and stir once more. Cover and cook on low 10 minutes more, stirring now and then. Remove lid, stir and continue cooking uncovered to allow most of excess stock to cook away. Stir in the vinegar (if using) and serve.

For the Pork Chops…

4 – Center Cut Bone-In Pork Chops, about 1/2” thick, trimmed of excess fat
1 cup – Chicken Stock
1 Tbsp – Dijon Mustard
1 Tbsp – Plain Non-Fat Yogurt
1 Tbsp – Whole Wheat or Unbleached Flour
3 Tbsp – Olive Oil
McCormick Italian Herb Seasoning Grinder

Sprinkle the pork liberally with the Italian Herb Seasoning Grinder then with kosher salt and set aside (at room temperature) for 20 minutes.

In a large skillet heat 3 Tbsp. of olive oil over medium high heat until shimmering. Gently lay the pork chops into the oil and reduce the heat to medium. Cook chops 3 minutes to brown then turn the chops and cook 3 minutes more. Move the chops to a foil or parchment lined sheet and place into the 350 degree oven to finish.

Remove the pan from the heat and stir in 1 Tbsp. of flour. Continue stirring until the flour is blended with the remaining oil then return the pan to the heat. Cook, stirring for one minute more then add the chicken stock. Using a whisk, stir the stock until well blended then allow the sauce to come to a boil, stirring occasionally.

When the sauce has thickened somewhat, whisk in the mustard and continue cooking and stirring until the sauce becomes quite thick. Remove the pan from the heat and turn off the burner. Remove the chops from the oven and place on plates or a platter. With the pan still off the heat, whisk in the yogurt until well incorporated then spoon the sauce over the chops.

Serve with the cooked greens and sweet potatoes.

Enjoy!

Randy